
Travel photography tips for incredible photos

Sample freeze frame photo shot with an SLR camera.
Travelling with an SLR? This travel photography guide will guarantee you come home with the best travel pics.
In today’s digital age anyone can become an expert with a digital camera. Automatic settings make it easy for any user to create great pictures. But for the traveling photographer who wants control of their camera, and come home with travel pictures that are sure to impress their friends and family, manual is the only way to go.
Here are a few tips and tricks to help you capture the best travel photos. If you’re tired of letting the camera control your pictures it’s time to take action so you can capture that perfect sunset, portrait or action shot. Whether its surfing costal South Africa, taking in a sunset or trekking in the Philippines, with these simple tips you’ll be ready to capture the perfect images you’ve always wanted.
Shutter Speed and Aperture
These five tips will help you capture the images you want by controlling the aperture and shutter speed. Remember, in order to meter properly you are going to have to adjust both the aperture and shutter speed. These tips will help you get the pictures you want letting you control the shutter speed an aperture. Regarless of whether you’re using manual, shutter speed priority, or aperture priority using these presets will get the results you’ve been longing for.
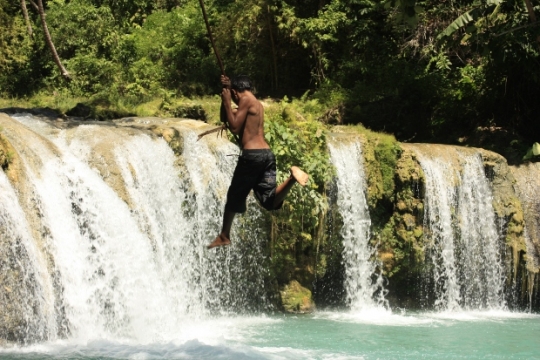
Freeze action – Shutter Speed 1/500 – 1/1000
To get that perfect image surfing, cliff jumping, or cruising along a busy street on a scooter a fast shutter speed is what you need. In order to freeze an action shot try to use the above shutter speeds. Remember to adjust the aperture in order to meter correctly preventing under or over exposure. You can also use a fast shutter speed to capture a clear picture of a crashing wave or freeze frame a waterfall. With this setting your action shot options are limitless.

A misty waterfall shot in Rain mode.
Rain – Shutter Speed 1/60
Forget rain, how about a misty waterfall or a crashing wave. If you’ve ever wondered how professionals get those flowing images of a river, waterfall or crashing wave, blurring the rushing water to create a whispy effect try using a slower shutter speed. If you want to capture water droplets falling on an object this shutter speed will do it. Have some fun practicing and see what you get.

Use the ‘f-stops’ to focus on your subjects.
Close up – f4-5.6
Wondering how to get that perfect close up shot try using the f-stops above. These settings will allow you to capture the image clearly while slightly blurring the background. The larger the f-stop or aperture the more clear the background will be.

The ‘who cares’ aperture is great for landscapes or architecture.
Who cares – f8-11
To capture those landscapes or architectural gems try using a “who cares” aperture. If you’re not trying to show depth use an f-stop between 8-11 to get that group shot or mountain shot. Using a “who cares” aperture is also good to keep as a preset. After taking a picture you should always go back to your preset. Using a shutter speed of 125 and aperture of f10 you will guarantee that if you need to take a quick image your camera will be ready and you won’t be stuck fiddling around.
Show Depth – f22
If you want to show depth in your image capturing something in fore, middle and background than an aperture of f22 will do the trick.
Rules
- Fill the Frame – Stop trying to get all that background in the picture. If you want a great image zoom in and fill the frame. Show your audience what you’re seeing don’t distract them with all the background stuff.
- Minimize Distractions – Check your background for distractions. If you’re taking a portrait shot an there’re telephone wires in the background you’re going to take away from the person in the picture. Minimize those distractions and I’ll guarantee you’ll make that person look really good.
Metering
Metering takes practice, in order to meter properly you need to let the perfect amount of light into the camera. Adjusting your aperture and shutter speed will allow you to control this. But where do you point your camera to meter correctly. These five rules will help you meter correctly for the five most popular landscape shots.
- Sunny – meter the sky
- Sunrise/Sunset – meter side of the sun
- Dusk – Meter the dusky sky
- Costal/Lake – Meter reflection (water surface)
- Green (forest) – expose -2/3
Depth of Field
All in focus – focus 1/3 into the picture (5ft)
If you have an old camera like me sometimes getting things into focus can be a bit of a challenge. Often I find myself flipping on the manual focus and working from there. If you’re stuck, and the automatic focus isn’t giving you what you want, try to use manual focus. I’m always taking classroom shots and the automatic focus sometimes zones in on one student and blurs the others. When trying to get everyone or everything within your image in focus concentrate on making 1/3 of the image clear or 5ft into the picture.
Have fun!
Yak


